Porrima Development Process
Porrima Production Process
Step 1: Setup Folder Structure and Pull Framework and Content Boilerplate
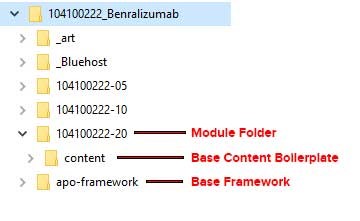
- Setup up the folder structure as shown below.
Repo Links
Framework (only need to pull once per project folder)
https://bitbucket.org/apo_udf/apo-framework/overview
Content Boilerplate (pull for each module)
https://bitbucket.org/apo_udf/apo-content-boilerplate/overview
Style Guide Content (generic content samples)
https://bitbucket.org/apo_udf/apo-styleguide-content/overview
APO Builder (for template generation and release builds)
https://bitbucket.org/apo_udf/apo-builder
Step 1: Breakdown Sheet & index.json Setup
- Setup the breakdown sheet using the screen types referenced in the Template_List Google shared doc.
- Then open the index.json file from the content boilerplate for the specific module.
- Populate the template with the corresponding details (lesson titles, event numbers, titles, and screen types). Screen types should match exactly with Template_List doc in order to pull the correct template file. Note that special characters and especially “:” should be escaped in any text to avoid errors during publishing.
- After index.json is filled out run the following command from the project root folder to build the _content and _data folders in the content boilerplate with the appropriate starter templates.apo_builder content -s mod1/content/index.json -d mod1/contentNote: replace “mod1” in two places above with the appropriate module folder that you would like to build into.
Step 2: Setup Content and Create Release for Development
- In the content folder edit the _config.yml with the appropriate course title and global settings.
- Open the localizations.json file and update the course disclaimer text to match storyboard.
- Add any global color branding overrides should be made to color.scss file (copy from framework and paste into _scss folder in boilerplate).
- Any template overrides should be made to brand.scss file in assets/stylesheets folder.
- Add FPO menu button tile images.
- After all global settings and assets are added to content boilerplate run the following command from the project root to create a dev release:apo_builder release -t dev -d mod1 Note: replace “mod1” above with the appropriate module folder that you would like to build release into.
- There should now be a release folder in the module folder next to content. Open the release folder and launch the index.html file to view the module.
Step 3: Drop Content & Build Course for Alpha
1. Populate all of the content templates files. Preferably start with glossary, references, and assessment files. Then you can test glossary linking as you add the content.
2. Run the following watch command from the content boilderplate root to apply changes to release as you go:
jekyll build –destination ../release/content –watch
3. After all text is added, drop any audio, image, and PDF files into the assets folder and link. Note that graphics can be flatted jpg or png and do not need to be a specific size but should be approximate double the output resolution.
4. After the module is complete and ready for QA it is time to do a content build. First, delete the current release folder.
5. From the project root folder run the following course build command (this will take several minutes to run depending on the size of the course):
apo_builder release -t course -d mod1
6. Once complete a new release folder will be created in the module folder. This new release will include all of the page thumbnail images and all images will be compressed.
7. Test the module to make sure all pages load, audio plays, and glossary terms function, etc.
Step 4: Setup course for QA tracker
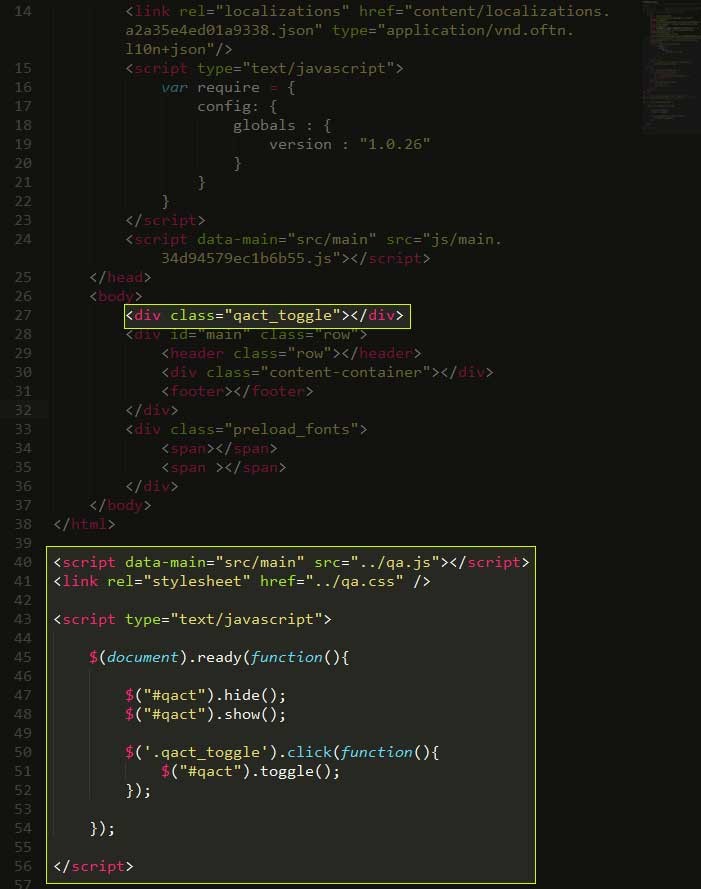
- Before posting the course to QA tracker you will need to add the QA tracker code to the release index.html file. Add the following code as shown below:
//insert after <body> tag
<div class=”qact_toggle”></div>
//insert after </html> tag
<script data-main=”src/main” src=”../qa.js”></script>
<link rel=”stylesheet” href=”../qa.css” />
<script type=”text/javascript”>
$(document).ready(function(){
$(“#qact”).hide();
$(“#qact”).show();
$(‘.qact_toggle’).click(function(){
$(“#qact”).toggle();
});
});
</script>